"The best thing that can come out of a garden are gifts for other people."...Jamie Jobb
Well, here it comes, my favorite time of year, and I am excited for the things to come in this cooler weather! Mainly apple season! I am so thankful for Natures gift of fruit, but even more thankful when I can share the abundance with others, making pies and cakes for celebrations and church functions!
I also came across this great little tool I can't wait to put to good use! Makes perfect bite-size, or kid size, pies!
I have to say, the official start of the season started for me last week when I tried one of the new Tastefully Simple fall products I'm selling, Cinnamon Apple Syrup. The blend of cinnamon, nutmeg, apple and all spice is out of this world! All together it reminded me of something from the olden days of plopping those ingredients in an a cast iron skillet and letting them simmer all day, very rustic and gourmet at the same time! Move over Smuckers and even good old maple syrup, our household has a new favorite!
My hubby and I talked last month about looking into getting a fruit bearing tree, though I had to remind him of the memories I had of the ones my babysitter had in her backyard. Though she was able to make plenty of pies, applesauce and other yummy concoctions, it was inevitable that some, okay most of her, apples fell when too ripe and if you were away or too busy for more than a few days time, the tree would leave you with a sour smelling mushy pile of ripe apples that the bees couldn't get enough of, being real pain to clean up too!
So I had to mention the fruits that have skins, I remember my Grandparents orange trees in Florida and sure they had their messy moments too, but nothing like the thin skinned apples! And just last month I read on our local Homestead Gardens website that you can grow lemon trees in Maryland, now that would be up my alley for sure! And even easier, put them in containers, sooo have to try this next year! Homemade lemon meringue pies, here I come!!!
All that tree talking got me thinking of apple picking and I am looking forward to going each year to the farm my parents took my brother and I when we were growing up. It will have to be a new family tradition to go near my brothers birthday, what a special way to keep his memory alive for the boys each year!
So looking up their website to re-familiarize myself with their festivities, homemade apple cider and fritters- yummm, I came across some apple recipes I'll have to try out with the abundance we're sure to collect early next month. Can't wait to share the goodness of the garden with others!
GLAZED APPLE PORK CHOPS
4 (3/4 inch thick) center cut pork chops
Salt
3/4 cup all-purpose flour
3 tablespoons vegetable oil
4 cups (1/2 inch thick) peeled, sliced cooking apples
1/2 cup firmly packed brown sugar
3 tablespoons maple-flavored syrup
Sprinkle pork chops lightly with salt; dredge in flour.
Heat oil in a heavy skillet; brown chops on both sides. Remove chops from skillet; drain off drippings, reserving 1 tablespoon in skillet. Return chops to skillet, and tip with apples, brown sugar, and syrup. Cover and simmer 35 to 40 minutes.
Yield: 4 servings
--------------------------------------------------------------------------------
SWEET POTATO-APPLE BAKE
1 large cooking apple, peeled and quartered
2 cups mashed sweet potatoes
2 eggs, separated
1/2 teaspoon vanilla extract
Vegetable cooking spray
1 1/2 teaspoons reduced-calorie margarine
Apple slices (optional)
Lemon juice (optional)
Place apple quarters in a saucepan; cover with water, and bring to a boil. Reduce heat, and simmer 5 to 8 minutes or until apples are tender. Drain.
Position knife blade in food processor bowl; add apples. Top with cover, and process until smooth. Combine apples, sweet potatoes, egg yolks, and vanilla; stir well, and set aside. Beat egg whites (at room temperature) until peaks are stiff but not dry. Fold into sweet potato mixture. Pour mixture into a 1 quart casserole coated with cooking spray; dot with margarine. Bake at 350F for 40 to 45 minutes or until browned. Garnish with apple slices dipped in lemon juice, if desired.
Yield: 8 servings (about 121 calories per 1/2 cup serving)
--------------------------------------------------------------------------------
APPLE PIE CAKE
1/4 cup butter or margarine, softened
1 cup sugar
1 egg
1 cup all-purpose flour
1 teaspoon salt
1 teaspoon ground cinnamon
2 tablespoons hot water
1 teaspoon vanilla extract
3 cups peeled, diced cooking apples
1/2 cup chopped pecans
Rum Butter Sauce
Whipped cream (optional)
Cream butter; gradually add sugar, beating at medium speed of an electric mixer. Add egg; beat until blended. Combine flour, salt, and cinnamon; mix well. Add to creamed mixture; beat on low speed of an electric mixer until smooth. Stir in water and vanilla. Fold in apples and pecans; spoon into a greased and floured 9-inch pie plate. Bake at 350F for 45 minutes or until a wooden pick inserted in center comes out clean. Serve warm or cold with rum butter Sauce and whipped cream if desired.
Yield: one 9-inch pie.
--------------------------------------------------------------------------------
RUM-BUTTER SAUCE
1/2 cup firmly packed brown sugar
1/2 cup sugar
1/4 cup butter or margarine, softened
1/2 cup whipping cream
1 tablespoon rum
Combine first 4 ingredients in a small saucepan; mix well. Bring to a boil, and cook 1 minute. Stir in rum.
Yield: about 1 1/4 cups.
--------------------------------------------------------------------------------
CHEESY APPLE SALAD
3 medium apples, unpeeled and cut into thin wedges
2 cups sliced celery
1 (20 ounce) can pineapple chunks drained
1 (8 ounce) package sharp Cheddar Cheese, cubed
3/4 cup slivered almonds, toasted
1/2 cup commercial sour cream
1/2 mayonnaise
Leaf Lettuce (optional)
Combine first 5 ingredients in a mixing bowl; set aside.
Combine sour cream and mayonnaise; mix well. Pour over apple mixture; toss gently to mix. Chill 1 to 2 hours; serve on lettuce-lined plates, if desired.
Yield: about 10 servings
Then there's the candles out that fill the home with the scents of autumn, I am ready, so Mother Nature bring it on!
Friday, September 17, 2010
Friday, September 10, 2010
Monday, August 30, 2010
New pre-school backpack

Well, today was the 1st day of Gavin's 3yr old pre-school class!
I was so excited to use the adorable pre-school Pottery Barn backpacks the boys received from Sue-Sue but his school asked that we bring standard size backpacks, as art projects and papers don't fit well in the pre-school sized one. I agree, I cannot fit a standard size paper or coloring book in there without folding over the corners and shoving it in, but I'm still pretty bummed he couldn't use it for school! But at least they now have great church and 'going to Grandmas' bags, thanks again Sue-Sue!
So over the weekend Mom-Mom T. had given him a freebie backpack that she got from her work and it was pretty plane-jane to me so of course I had to spruce it up a bit!
So over the weekend Mom-Mom T. had given him a freebie backpack that she got from her work and it was pretty plane-jane to me so of course I had to spruce it up a bit!
 I took him to the fabric store to choose his own material to decorate his backpack with. I know without a doubt that he would have chosen cars/truck or construction things but of course we got there and there were only 3 bolts of fabrics geared towards boys and 2 shelves worth of fun prints for girls, always how it is, poor boys get the short end of deal when it comes to clothing and now even fabric!
I'm sure if I scoured fabric stores all over MD or even the Internet I'd find something interesting, but I didn't have that kind of time and wasn't going to ruin the experience of him picking out his own fun thing by dragging him from store to store, that's no fun no even if you're not 3 yrs old! But even the lady who cut the fabric for us said that's what she wants to do when she retires, design material for boys b/c there isn't enough cute stuff out there for them- AMEN to that!
Gavin did go with a puppy dog print he liked, he called them 'choc-choc dogs' because some of their spots look like chocolate chip cookies :) I have to agree, they are cute!
So 2 hrs of gluing and sewing by hand was well worth the end result of a pre-school worthy backpack. Just hope it lasts the whole school year! If not, no biggie, at least it only cost me $8 total for the material and super sharp 'glove' needles that worked like a charm.

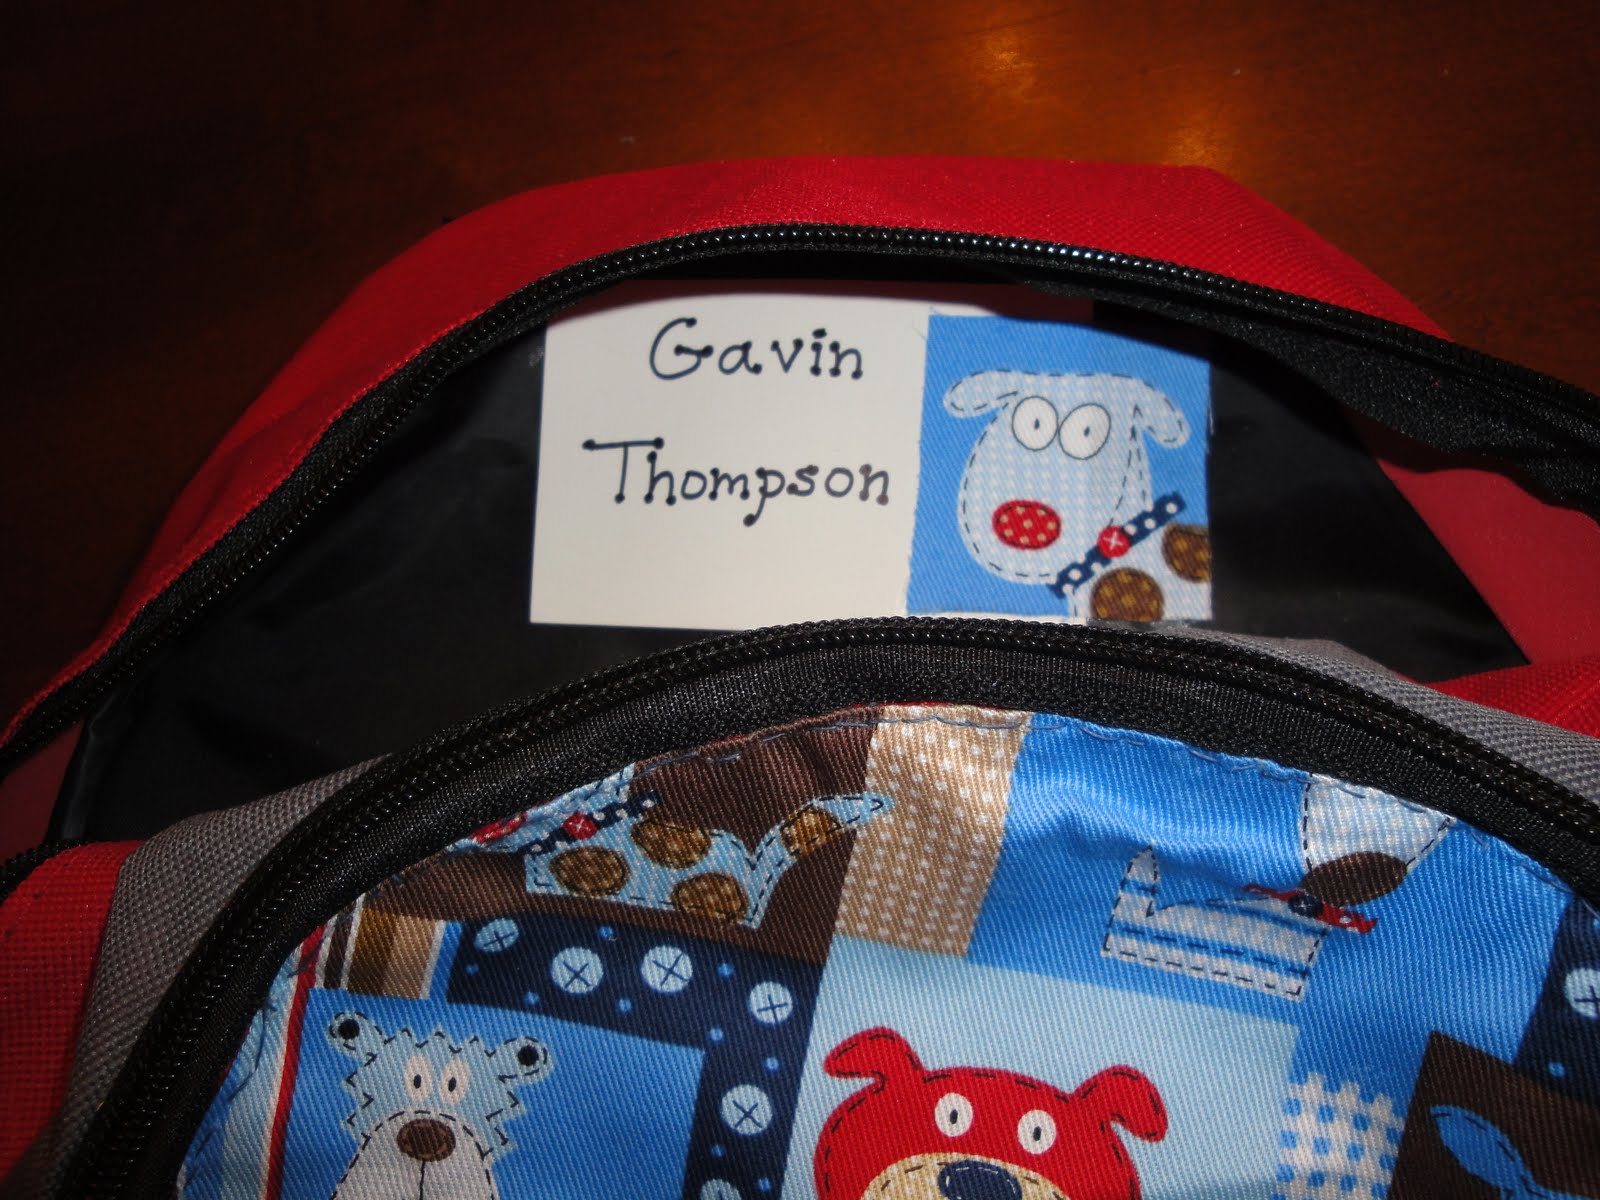
I even got to spruce up the name tag inside :)

Donut hole cake
I've been gathering info for holiday gatherings and Gavin's next birthday party and stumbled upon this idea online somewhere and had to give it a whirl! Super easy and adds a touch of fun to a party for sure!
 All you need is:
a syrafoam cone
wrapping paper (to keep the crumbly styrafoam off the donuts)
toothpicks
approx. 55 donut holes ( donuts are 1/2 price after 6pm at Dunkin Donuts too!)

Wrap the cone with wrapping paper
 Then start applying the donuts with the toothpicks. It's super easy!
I tried to make different colored bands around the cone but didn't have equal numbers of flavors. That and the boys, okay... me too, love the chocolate ones so I always ask for the box of munchkins to be half full of chocolate ones and the rest mixed. So this tower was mostly chocolate at the top.
And another note, I recommend starting with the larger sizes on the bottom and using the smaller ones at the top- you always learn the first time trying anything.
We gave this one to Aunt Stephanie so when she stopped by on a DNR run to Jug Bay she could take it back to work with her and share it with her co-workers, if it actually got to work first!
Friday, August 20, 2010
My Go-to Fudge Frosting
The greatest gift of the garden is the restoration of the five senses. ~Hanna Rion

All this week I've been craving chocolate and nothings quenched the taste for me this week, not brownie ice cream, toffee chocolate cookies or just eating a plain old piece of chocolate. Well, after tonight the craving's subsided thanks to a super chocolaty recipe I use in just these situations.
I could have gone for straight fudge and that might have done the trick but I was also in a cake mood. So I opted for the quick result and stuck to a chocolate box cake mix, added chocolate chips to the batter and made cupcakes. Super simple but they needed the ultimate topping, fudge! I love butter cream and it has a special place in my taste repertoire when it comes to cake but there's nothing like melt in your mouth fudge! I even went the extra mile to slice the cupcakes in half and pour some in the middle as a layer. Like a small decadent cake for 1!

Fudge Frosting:
4 cups confectioners sugar
1/2 cup unsweetened cocoa
1/4 tsp. salt
2/3 cup boiling water
1/3 cup unsalted butter, softened
1 tsp. vanilla
Combine sugar, cocoa and salt in large bowl. Stir in water slowly. Add butter and vanilla and beat until smooth, adding very small amounts of additional boiling water if frosting is too stiff.
Makes enough to cover one layer cake; square, round or loaf. It's great poured onto a bunt cake too!
The messier the better!

Saturday, August 14, 2010
The joy of flowers and familes

Paperwhite Narcissus: my birth-flower
I love flowers, any and every kind. I'm often drawn to their color, shape, fragrance or even the meaning symbolizing each different one.
And of course there's the never-ending love of our family, each and everyone too. So incorporating flowers together with family makes for great memories.
Even if I have two boys, they can still like flowers too, right? Not like I'm putting them in their hair or anything, though they're so young still they might not notice a girly appearance and get offended :)
Stick 'em up: Paint a bunch of popsicle sticks green with your child, then glue a cupcake liner to the top of each stick to make easy flowers. For Grandparents Day I traced each boys hand, glue a cupcake liner in the middle, let them glue seeds inside the liner, and when that was dry glued it to a stick, and for a finishing touch added construction paper leaves.
Birth flowers: Forget birthstones, what about birth-flowers! Birthflowersguide.com allows you look up the flower of your birth-month. It might say alot about your child's personality too, but just like any astrology or horoscope, take away what you will from it. What a great idea to make a family portrait though, not of photos, but out of everyone's pressed birth-flowers! No bouquet could top that one in my book when each flower represented a family member!
Christmas in July...well, now August :)
I was so busy last month I didn't have much time to check out all the great blogs and sites I follow regularly. This month I'm trying to catch up!
In the midst of Christmas shopping and planning this summer, I am sooo syked to be done for the immediate family already, I came across some Christmas in July tips I thought I'd share with you from Tip Junkie. I get tons of 'make it your own' or 'free printable stuff' from her site! Enjoy!
In the midst of Christmas shopping and planning this summer, I am sooo syked to be done for the immediate family already, I came across some Christmas in July tips I thought I'd share with you from Tip Junkie. I get tons of 'make it your own' or 'free printable stuff' from her site! Enjoy!
Subscribe to:
Posts (Atom)