Friday, October 28, 2011

FREE Scrapbook Software Giveaway!!!!

Congrats Janie! 
I'll send you the info for getting your free Memories Suite once the company sends me your access code!  I know you'll enjoy!
*Giveaway now Ended*

________________________________________

Okay all, time for a great FREE Giveaway to one of my lucky readers!  I was contacted last week from a representative from MyMemories, a great digital scrapbook software program for anyone from the novice scrapbooker to the extreme picture taker who never remembers to print all their pictures!  are giving They away a program to one of you for free, whoo-hoo!  You will all love this My Memories Suite, I know I do!  Here's a clip of what it's all about on YouTube.


When Gavin was born I was your typical 1st time mom, taking tons of photos, scrapbooking when he napped, getting all the milestone photos done at photo shops.  Then only a yr later when Carter arrived I vowed to take the same photos and make the same books so he wouldn't feel left out, but... best laid plans don't always work out!  I didn't have that same down time as Carter was colicky for the first 3 months and with two different nap schedules it was hard to get cleaning done let alone have time to scrapbook.   I did keep up with the professional photos but still feel bad Carter won't have a scrapbook to look at over the yrs as Gavin will.  That is until this opportunity!

I was able to play around with all the different layouts and must say that it is super simple and actually more fun than meticulously cutting out little pictures for an actual page, with no clean-up and of course it's much faster!

Here's a layout I chose

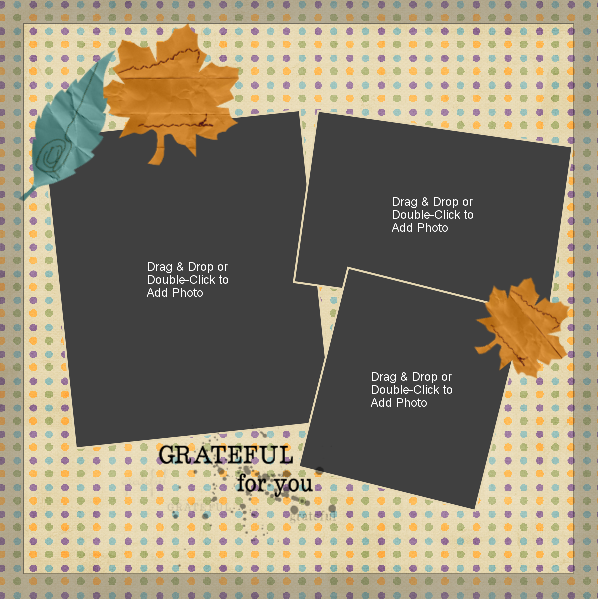
Below is a page I created myself... in under 3 minutes!


OMG, this was soooo easy!!!  Seriously, anyone can do this!  You just download the program, select the theme you'd like and either have the program automatically fill in photos or you can select certain ones.  Then you're done if you'd like, or if you're like me you have to add things to make it your own and more personal.  I added the text, buttons, green ribbon and the brown flower, and it was so simple!  There are also separate digital scrapbooking kits you can purchase to use on the program. 

Here's another page in this Fall group that is created for you, and once you add your photos you're done or you can add other embellishments if you'd like.


And the best part is once you purchase one of their digital scrapbooking kits, you can use the items forever!  Not like in-store where you buy the paper packs or embellishments and once you use them, that's it, no more unless you buy another one.  Where if you buy, say the animal crackers zoofari kit like I plan to, I can use the animals for decorating a birthday page for Gavin's upcoming jungle theme party but also use most of the items again on another page for our trip to the Zoo, the boy's lion costumes for Halloween, even using the cute animals on a baby page for an expecting Mom... my creative juices are flowing for sure with this one! 

You can then print out you creations on your printer or have it professionally printed for you as pages or even made into a book!  What great gifts these can be too!  And did I mention... no mess, no clean-up, no running to the craft store... it's all download-able, so no waiting for something to be delivered in the mail either, once you buy it... it's yours to use right then!


So here's how you enter to win your own My Memories Suite ($39.97 value) for FREE!

1. Visit the MyMemories website, choose what your favorite item is and tell us by adding a comment to this post. 

2. For an extra entry, friend MyMemories on Facebook and then leave another comment on here that you did so. (PS, there's a coupon code on their page for $5.00 off your purchase too- making some of their kits free!)


That's it, comment below and good luck!  Be sure to leave your e-mail address with your comment so I can contact you if you're the winner.  Also, feel free to spread the word to friends or family that may be interested too! 

I'll use random.org to choose the winner on Friday, November 4th and post the winner on here!

Wednesday, October 26, 2011

Literary Pumpkin Display


We were all excited to find out that Carter's Pre-K 3's class got to join the big kids in his school this yr in designing a pumpkin for the Literary Pumpkin Display.  This has been super fun to see which books are favorites and how creative the kids can be in creating a character from the story.

Carter chose his favorite book "Cupcake- A journey to be special"  The story has such a great moral to it and the cast of cupcakes and candles are too cute!  

We were then supposed to make a character from the book using a pumpkin.  I truly thought he'd pick Stripy Cupcake, he always says that one is his favorite, but he chose the main character Vanilla and I'm glad he did, I had fun making the candle :)

He got to help paint the vanilla icing on, white paint of course, and help draw the U's for the creamy frosting.  Then we chose the color yellow to match Vanilla's wrapper, he helped to color green paper to make the perfect green candle and we painted a toothpick black for candle's wick.  I cut out the rest of the details and we put it all together.  Super cute!


Most of the pumpkins that were decorated at the school were the big ones, they're a bigger canvas for painting and making faces, but I thought a mini pumpkin fit a cupcake theme perfectly.

Some of the other designs are pretty fantastic and super creative!

Smurfette is pretty cool, though my boys haven't a clue what she is and prob won't know who they are for yrs to come with the new movie that just came out looking not so good.

Gavin spotted Tow-Mater right away!

Squash penguin, sooo cute!


Three little pigs and the wolf, ingenious!

Can't wait till next yr to do it again!

Wednesday, October 19, 2011

Canned Apple Pie Filling

After picking an enormous amount of apples the beginning of the month I knew as the kids were picking every apple in sight that I would be making more apple pie filling than I planned to use for upcoming holidays.  This yrs batch was awesome, though I'm sure it's the freshness of the apples and all the love that goes into it that makes it better than the ones on store shelves.  Some jars may even become gifts with the frugal Christmas we'll be having this yr!


Canned Apple Pie Filling
Makes 9 quart jars of filling.
2 quart jars make a 9"pie

You will need:
12 cups sliced peeled cored apples, treated to prevent browning* (about 12 medium apples)
8 cups water
3 cups apple juice
4 cups granulated sugar -may substitute 1 cup of granulated for brown sugar
2 tsps ground cinnamon
1/2 tsp ground nutmeg
1 tsp salt
3/4 cup ClearJel® (cooking starch used for preserving) or 1 cup cornstarch
1/2 cup lemon juice
8 (16 oz) pint glass preserving jars with lids and bands (though this made 9 jars of pie filling for me and one small jar of just the filling; which we use on pancakes/waffles)

*mix a little lemon juice with the sliced apples

Directions:
1.) PREPARE boiling water canner. Heat jars and lids in simmering water until ready for use. Do not boil. Set bands aside.
2.) BLANCH apple slices, working with 6 cups at a time, in a large pot of boiling water for 1 minute. Remove with a slotted spoon and keep warm in a covered bowl.
3.) COMBINE sugar, cornstarch, salt, cinnamon and nutmeg in a large stainless steel saucepan. Stir in apple juice and cold water.
-Bring to a boil over medium-high heat, stirring constantly, and cook until mixture thickens and begins to bubble.
-Add lemon juice, return to a boil and boil for 1 minute, stirring constantly. Remove from heat.
-Drain apple slices and immediately fold into hot mixture. Before processing, heat, stirring until apples are heated through.
4.) LADLE hot pie filling into hot jars leaving 1 inch headspace. Remove air bubbles with spatula. Wipe rim. Center lid on jar. Apply band until fit is fingertip tight.
5.) PROCESS jars in a boiling water canner for 25 minutes, adjusting for altitude. Remove jars and cool. Check lids for seal after 24 hours. Lid should not flex up and down when center is pressed.