Thursday, December 27, 2012

Cork Reindeer Ornaments


Between hubby, myself and both our mothers we go thru some wine, and some are special so I have been saving the corks.  I saw in a catalog that there is a cork trivet you can make and wondered if there was anything else you can make from those little stoppers. 
(made the cork trivet for Mother-in-Law btw, it was a hit!)
 
Then I found them... the cutest reindeer ornaments from corks!


You need a few corks, 2 per reindeer
Small sticks to use for legs, neck and antlers (kids helped collect these)
Hot glue gun
Push pins with balls on the end, for the nose
Wire cutters
Small Philips head screwdriver or metal nail
Ribbon
Scissors


Make 4 holes on the bottom of one cork using the small screwdriver or nail, making sure the stick will fit in the hole. The corks are very forgiving so dig in!

 
Make sure to break or cut 4 twigs the same length and see how they look in the cork.  It's easy to twist them around or swap spots to get better balance.


After you're happy with how it looks put a dot of hot glue into the holes one at a time and push in the twigs.

 
For the head, I cut my second cork down a bit with a knife, it's all in how you want the reindeer to look.
 
 
Then poke a hole in the cork for the neck and another hole on the top of the first cork for the neck to fit in.  Glue in place.  Do the same for the antlers and you're all set!


I added a red pushpin for the nose and another to hold the ribbon at the base of the neck.
 
They turned out super cute and the wine-o's at Christmas enjoyed their gifts made with love!

Tuesday, November 27, 2012

A Special Announcement

I've been looking for a different way to announce something special and one night while in bed it came to me... use a photo!


Since we knew this would be our last child we wanted to spread the word a little different this time around, and do you know how difficult it was not to tell my Mom right away, but she deserved a surprise just like everyone else!
 
I waited until Thanksgiving to tell the immediate family by having the boys wear their shirts, what a way to get a reaction!  Then instead of chain phone calls we sent out postcards to everyone else to let them know the big news.
 
The post cards were super easy, I just took a photo of the boys in their new Big Brother shirts (which were made by VistaPrint and shipped super fast) and used the photo as the post card!
 
I didn't want to risk the chance that someone wouldn't get what the photo meant so I came up with a saying to put on the back, printed it out on sticky paper and stuck the poem to the back of the photo, added the sending address and finally a postcard stamp- super easy and inexpensive!
 
Poem:

 If you haven't guess by the photo
just read what our shirts say,
we found out that our family will be
growing by one more just the other day.
 
Daddy says this will be our last addition
and Mommy does agree,
but we can't wait until July to meet our
new Baby-to-be!
 
Two Proud Brothers,
Gavin & Carter
 
 
We are so excited for our family to grow even more, and I have  to say that he or she is lucky to have two great big brothers to grow up with- can't wait for the fun to begin!

Monday, October 29, 2012

Homemade kind of day


With all of the festivities this weekend I'm surprised I had the energy to make all that I did in a 3 day period! 
 
First up was making a Mummy cheese spread and some strawberry filled pumpkin cupcakes on Friday.
 
 
This little guy was super easy to make, using Tastefully Simple's Smokey Cheese Ball Mix I shaped it into a person and then with 2 raisins, about 4oz of softened cream cheese and a Ziploc baggie I wrapped him up.  And have to laugh that Gavin calls it an astronaut every time he sees it!
 
Then that evening was our 1st time driving Go Karts as a family, sooo much fun!!!  Expensive, so a thanks to Plum District for offering the coupon, but fun nonetheless!


Then the boys had their last Soccer games Saturday morning, so sad as they were both getting to be so good and enjoying every moment!  I can't say enough good things about the Upward division, the Christian values that were taught is something I hope the boys remember just as much as all the fun they had!

 
Next we were off to a dear friends home for some Halloween fun with homemade games we created earlier in the week!


And it looks like we might be missing out on trick-or-treating at the Grandparents on the 31st with hurricane Sandy on the way.  Glad we did our neighborhood festivities last week!


Then while spending hours in the kitchen on Sunday after Church (while Mike and kids cleaned-up outside before hurricane Sandy arrived) I had time to contemplate, how in the world did Mom's have time to spend with their children when there was no such thing as prepared foods or microwaves back in the day?  Prepping, cooking and cleaning the aftermath took me hours on end, at least we had the meal to talk and have quality time together but then it was off to clean the dishes and start on canning our apples, which took more hours out of the day.  At least Mike got to spend 1 on 1 time with the boys, but him being home is rare so I know I wouldn't have been able to cook anything if he wasn't home!

My 1st from-scratch Chicken Pot Pie turned out amazing!  It wasn't too hard to fix and was well worth it, sorry Marie Callendar, you're pies are good too but there's nothing better than enjoying the love and fresh ingredients that goes into the meal instead of knowing it came from a factory!


A great tip I found somewhere said you can shred warm chicken in the mixer, so true and much easier than doing it by hand!  Thanks to Safeway's $5 Friday pre-cooked chicken- this saved me so much time!


Simmer chopped onion in a sick of butter, add flour, chicken broth, bag of frozen veggies (or fresh as I had some corn and carrots on hand) and shredded chicken... so simple!  You don't even need to measure ingredients, just eyeball it and it'll still taste good, take my word!


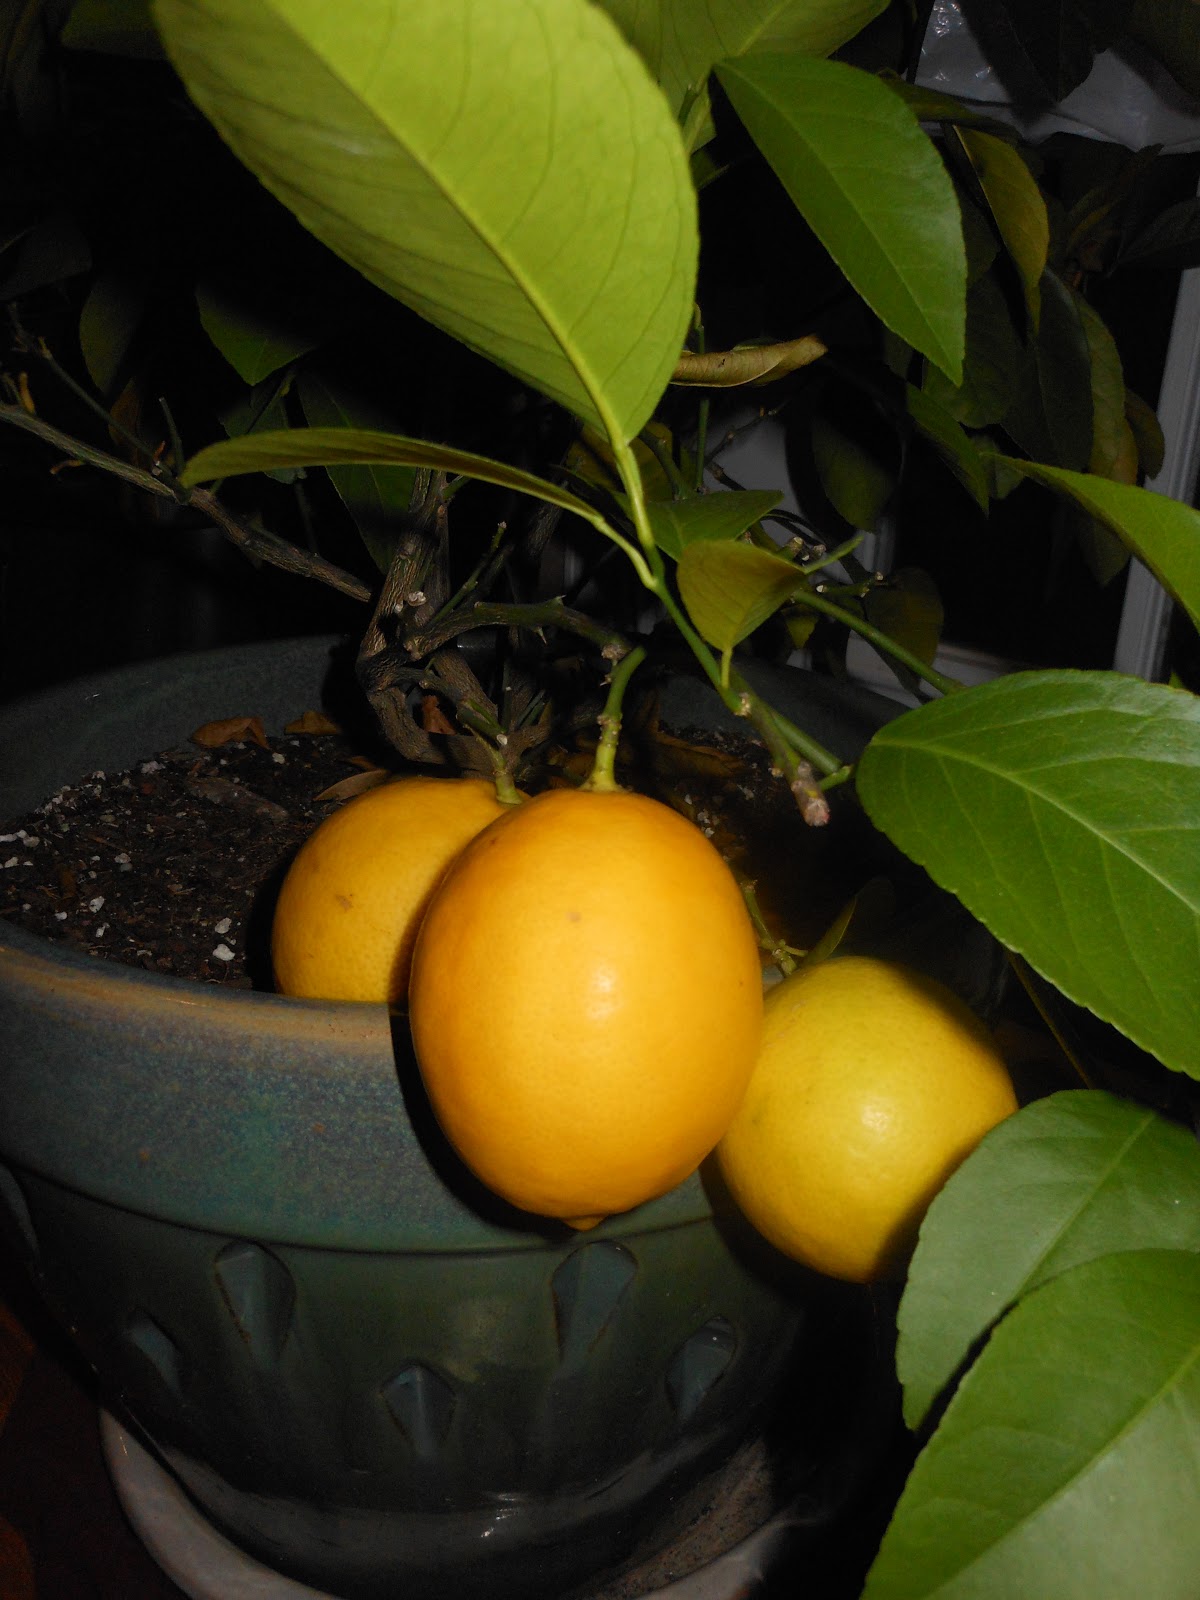
Then while the pie was cooling I remembered there were lemons that needed to be picked from our lemon tree.  This will give the boys something else fun to do, and teach Daddy as he's never done it with us before!


6 lemons rolled to perfection, water and sugar to taste... Mmmm!
 
Then while the kiddos were getting ready for bed, with Daddy -which never happens either so maybe my cooking day was a good thing for everyone, I had to cook-up the apples we picked at the farm a few weeks ago before the hurricane takes our power and they all go bad.
 

And couldn't go wrong using the Apple Pie Filling recipe I've used the past!  But somehow I ended up with 2 more jars than last time, bonus!  Guess the apples we picked were a bit larger this year!

Hope your Autumn has been just as busy, and yummy, as ours!


Tuesday, October 23, 2012

Crock Pot Applesauce

This time last year I was busy in the kitchen making apple pie filling with all the apples the boys picked at Larriland, well, this year is no different!  Though, I have decided to split up the apples and make both filling and applesauce this year.
 
Crock Pot Applesauce (a no fail recipe!)


8-10 cooking apples (10 if you have little helpers in the kitchen who like to help, aka: taste test ;)
About 1/3 cup apple juice (or water)
1 tbsp cinnamon
1/2 cup brown sugar
 
You can make and adjust to your own taste by adding different spices (nutmeg, or even a dash of cyenne for those adventours folks) or by using white sugar instead of brown or eliminating sugar all together if you're looking for a healthier version.
 
Turn the crock pot on Low and add the juice, sugar, and cinnamon. 
Cut, core, peel and dice the apples. 
Add the cut apples to crock pot and stir.
Cook on High for 4hrs or Low for 7hrs.
You can leave it chunky or mash them for a finer consistency.
 
You can preseve them by canning method or freezing in containers, even in ziplocks.
 
What to do with the apple peels is up to you, we fed the wildlife in our woods but would be great for a compost pile.
 
With one that was dropped on the floor we decided to do an apple pattern project while the apples were cooking.

 
Using the apple seeds to decorate was great, but we had to make the rest out of construction paper.


Happy Fall Ya'll!


Thursday, October 18, 2012

Easy Number Sequencing

As early as the autumn of 1862, I was made very happy by being sent to school.
-John Sergeant Wise


With my Kindergartner learing numbers in school I decided to reinforce the concept at home by coming up with a project that will teach numbers and sequencing.
 
I love the fact that my 4yr old is home on Tuesdays and Thursdays to help test out ideas so I made one for him to try out.


 (Feel free to print this project out for your own use)
 
Just print out, have them cut on the lines and put back together in number order, super easy!
 
For a fun puzzle project you can cut out and laminate (or use contact sheets) this yourself and save to re-use again and again- (like before dinner!).
 
This is seriously so easy that you can even use a sheet from a coloring book if you want!
 
But I had to put an art touch to it and have my little learner draw a picture and we made it into our own puzzle.


Tuesday, October 2, 2012

Halloween Glue Ghosts

Just the other day I was noticing how much I truly stocked up on some of my kids school supplies in the summer, how could anyone pass up the .25 glue bottles!
 
So here's a project that's great for Halloween and used about half a bottle.
 
You'll need:
Cookie tray lined with wax paper
White yarn
Elmers Glue
Construction paper or a black permanent marker for eyes and mouth

 
Just have your child lay out the yarn on the tray in the shapes of their ghosts.

 
Then fill with glue, making sure to trace the inner edge of the yarn so it adherers while drying.  This step was a little tough for my 4yr old so you may need to help squeeze :)

 
I then gave him a popsicle stick to move the glue around and fill in any air bubbles or holes

 
The next step is up to you, I thought my little one would like to drop the oval mouths and small eyes on so I cut some out of construction paper.  But after drying they bled a little, if that bothers you skip this step and draw on the face with the permanent marker when it's dry.


Here they are all filled in. Just sit the tray(s) aside where they won't get touched or bumped for a day or two and let them dry.


I threaded the tops with a needle so I could hang them, of course with festive pumpkins so they weren't too scary

Happy Decorating!
 

Tuesday, July 17, 2012

Baby's room button tree


These trees are quite addicting!

This gift is a little more subdued than my 1st button tree, though it still says girl, maybe she'll still want to hang this in her room when she's a teen :)

Monday, June 25, 2012

Seasonal Button Trees

A sale on buttons + a sale on canvas = a great teacher gift idea!


Since the swirly button tree I've had the idea of making a teacher gift she could use in the classroom or split up with her assistant and they each get a set.  These two ladies that taught the 3yr old preschool class at our church have had both of my boys and I can never thank them enough for the loving guidence they have provided! 

Gavin was so shy and had speach concerns but by the end of preschool he actually sang his first song all on his own one morning while lying in bed with me, Open my Eyes Lord, it was such a special moment I'll never forget!  And this year Carter has retained so much information he's able to say the Our Father with us at church and sang the song Emaculate Mary he learned at school so perfectly for my Mom, which is her favorite song, that I'll never forget that moment either!

Just hoping to give them something that won't be a dust collector, won't be used and forgotten and everytime they see it they'll think of the boys and smile.

Each boy had their hand in creating the trees, though Carter sat the longest so I only got a photo of him :)


Winter/ Spring

Summer/Autumn